fadi
FADI - Ingest, store and analyse big data flows
User Management
- 1. Create the LDAP server
- 2. Configure the various services
- 3. Manage your LDAP server
- 4. Creating groups
This page provides information on how to configure FADI user authentication and authorization (LDAP, RBAC, …).
For user management, FADI uses OpenLDAP to ensure the LDAP user authentication for the platform services.
1. Create the LDAP server
“OpenLDAP Software is an open source implementation of the Lightweight Directory Access Protocol.”
The OpenLDAP service creates an empty LDAP server for the company Example Inc. and the domain example.org by default, which we will overwrite via the environment variables in the Helm chart.
The first entry that will be created is for the administrator user. To initially connect any of the services, use the following credentials:
- Username:
admin - Password:
password1
Once created, we either add the users/groups manually through the phpLDAPadmin web interface, or pass a LDIF file (see the sample ldif file) to the chart.
2. Configure services
Grafana
Grafana has 3 roles by default: Admin , Editor and Viewer. To assign these roles to the different groups of LDAP users, we need to pass that information through the configuration. Let’s assume we have a group of developers in the LDAP server with the entry cn=developers,ou=groups,dc=ldap,dc=cetic,dc=be that we want to give the role of Editor. We can add these 3 lines of configuration under the default LDAP configuration that FADI already provides:
[[servers.group_mappings]]
group_dn = "cn=developers,ou=groups,dc=ldap,dc=cetic,dc=be"
org_role = "Editor"
For more information, see Grafana LDAP documentation.
JupyterHub
JupyterHub configuration allows to give access to users/groups through templates, the templates usually follow this syntax:
uid={username},cn=admin,dc=ldap,dc=cetic,dc=beuid={username},ou=developers,dc=ldap,dc=cetic,dc=be
where {username} will be overwritten by the value the user passes as username in the authentication screen. Let’s suppose we only have those two templates, and the user David provides his name for authentication. For him to successfully sign in, his entry should be one of the following:
uid=david,ou=admins,dc=ldap,dc=cetic,dc=beuid=david,ou=developers,dc=ldap,dc=cetic,dc=be
which means that if David is not in the developers or admins groups, he will not be able to sign in.
A sample configuration can be found in the jupyterhub:auth section of the default FADI values.yaml file
More details on using LDAP with JupyterHub in the Jupyter documentation.
Superset
Superset uses Flask-AppBuilder Security for the LDAP authentication, in order to activate we need to pass the configuration inside python config configFile.py.
For more information on how to configure Superset with LDAP, follow the official documentation for the flask-appbuilder authentication-ldap.
For more information about the different options you can use to configure your Superset LDAP authentication, follow the official documentation for the Base Configuration.
PostgreSQL
LDAP authentication method in PostgreSQL uses LDAP as the password verification method. LDAP is used only to validate the username/password pairs. Therefore there is a Cron job that executes the tool pg-ldap-sync to synchronise the users between the LDAP server and the database management system.
Client authentication is controlled by a configuration file called pg_hba.conf, authentication configuration can be provided through the variable pghba in the values.yaml file.
The configuration for the most common methods of authentication are:
local      database  user  auth-method  [auth-options]
host       database  user  address  auth-method  [auth-options]
For example, to use LDAP authentication for local users, the configuration should look like this:
local all all ldap ldapserver=example.com ldapport=389 [other-ldap-options]
For more information about how to add LDAP authentication to PostgreSQL, follow LDAP authentication in PostgreSQL.
For more information about pg-ldap-sync: Use LDAP permissions in PostgreSQL
NiFi
Configuration
To configure LDAP in a Helm chart, we need to first enable it by setting the variable auth.ldap.enabled to true then configure the rest of the variables. Here is an example for the default FADI LDAP:
auth:
    ldap:
      enabled: true
      host: ldap://fadi-openldap:389
      searchBase: cn=admin,dc=ldap,dc=cetic,dc=be
      admin: cn=admin,dc=ldap,dc=cetic,dc=be
      pass: password1
      searchFilter: (objectClass=*)
      userIdentityAttribute: cn
Then we make sure to pre-set the traefikIngress, let’s say we want the domain name nifi.example.cetic.be, our traefikIngress configuration should look like this :
traefikIngress:
    enabled: true
    host: nifi.example.cetic.be
And then we set the properties as follows, the nifi.properties.webProxyHost variable should have the exact url that we are going to use to access NIFI later, if our dns is nifi.example.cetic.be, our configuration should look like this:
  properties:
    externalSecure: false
    isNode: false
    httpsPort: 8443
    webProxyHost: nifi.example.cetic.be
    clusterPort: 6007
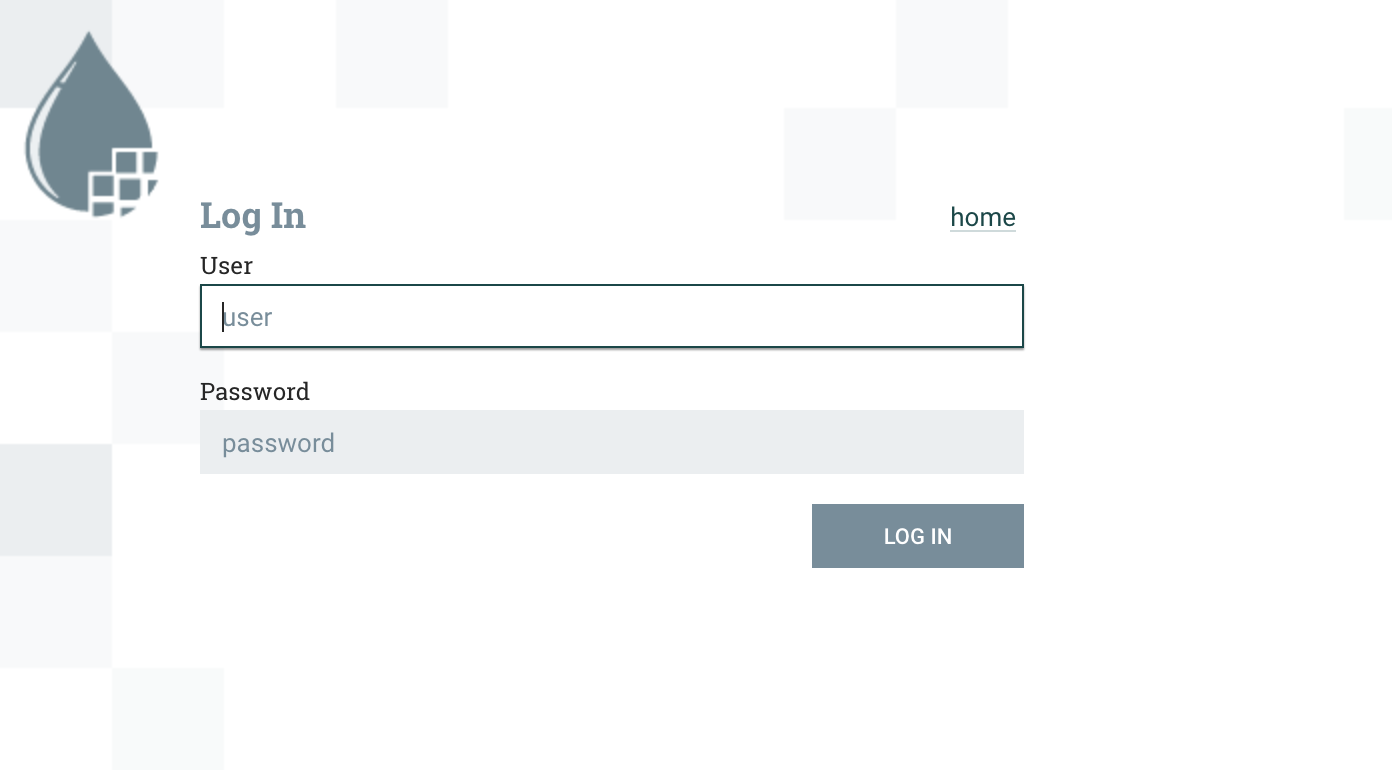
Sign in
When accessing Nifi, a sign-in screen will show up. Sign in using the LDAP username/password normally (not the full DN).
Important note: only one user can connect the first time and it is the user with the Initial Admin Identity, in FADI it is the default LDAP admin user (admin / password1). Once connected, the user interface will look like this :
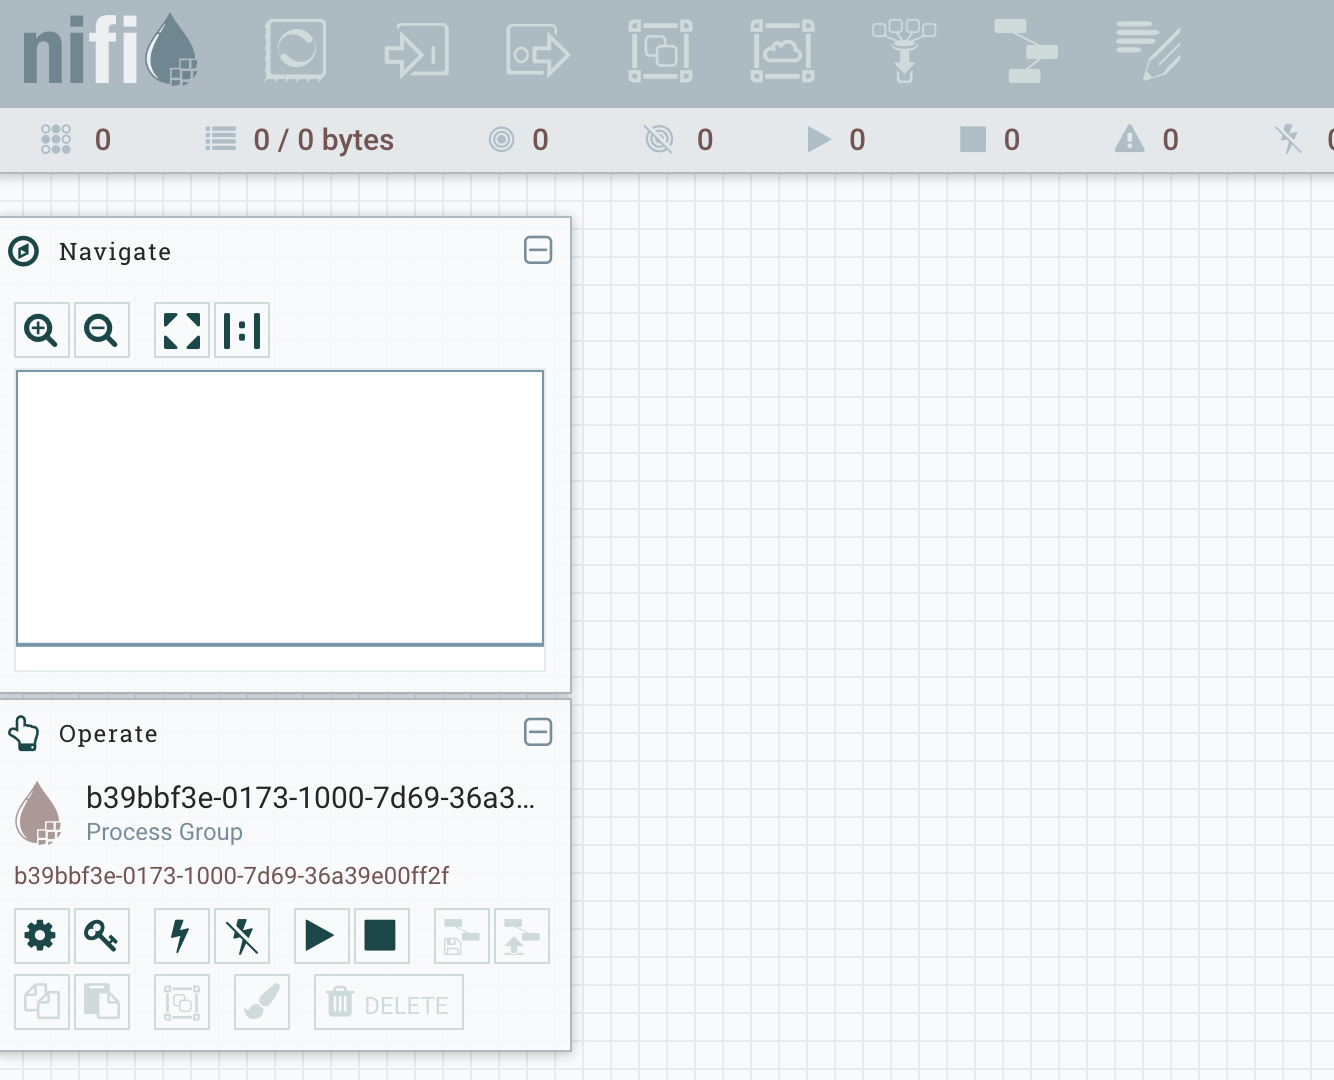
Everything is disabled and that is because there are no users registered and no policies (permissions) distributed, but the Initial Admin has all the rights to create policies and give permissions.
Authorizers & Initial Admin Identity
We can see that the initial admin has READ/WRITE access to /flow, /tenants, /policies, and /controller, and the cluster nodes have READ/WRITE access to /proxy. This allows the initial admin to get into the UI (/flow) and to create new users/groups (/tenants), and to create new policies (/policies). There are no policies granting access to the root process group, or any other components. This is why all of the actions in the toolbar are grayed-out.
We can create a policy for the root process group by clicking the key icon in the operate palette on the left:
After creating the necessary policies, the “view component” action on the root process group (which is essentially the READ action) and the “modify the component” (which is the WRITE policy for the root process group), the admin user will have the appropriate authorizations.
Note that this can be also done for the rest of policies.
Adding users
Adding the LDAP users has to be done manually through the user interface as there is no syncing mechanism to automatically add LDAP users/groups into NiFi.
When connected with the initial admin account (using the individual certificate), go into users to add users, and then into policies to grant access and rights to the users. In this example we are going to add the user John who already exists in the LDAP server (to add the user we should use the full DN: cn=john,cn=admin,dc=ldap,dc=cetic,dc=be).
After adding the user do not forget to assign the policies for that user to give the needed permissions: by default the new user cannot even access the user interface.
Multi-Tenancy
This is copied from this great article: Apacche Nifi - Authorization and Multi-Tenancy.
The policy structure is hierarchical, such that when access is checked for a component, if no policy is found then it checks the parent, and if not policy is found for the parent, it checks the parent’s parent, and so on, until reaching the root process group. This means that by giving ourselves READ/WRITE to the root group we now have READ/WRITE for all sub-components until a more restrictive policy is created.
Let’s simulate how two development teams might share a single NiFi instance by creating two process groups:
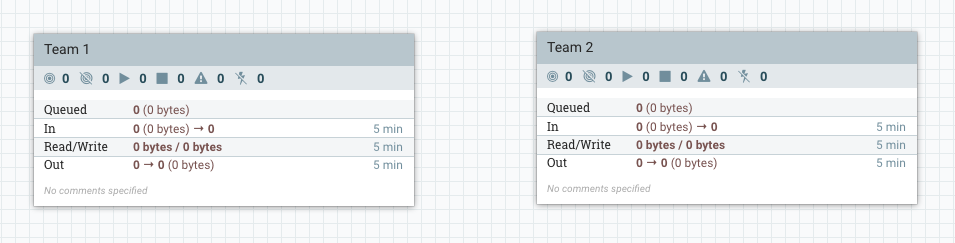
Let’s pretend we are a member of Team 1 so we should have full access to the first process group, but we should not be able to know anything about what Team 2 is doing, and should not be able to modify their flow. We can simulate this by creating a more restrictive policy on the “Team 2” process group that does not include the current user (the initial admin).
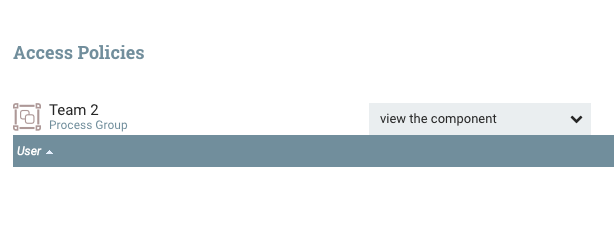
When selecting the “Team 2” process group, the palette on the left changes and says “Team 2”. This palette always operate in the context of the selected component, so if we click the key icon while “Team 2” is selected, we are now editing the policies for the “Team 2” process group. If we click the “Override this policy” link for “view component” and create a new policy without adding users, we should get the following:
If we do the same thing for “modify the component” and then return to the main canvas we should see the following on the next refresh:
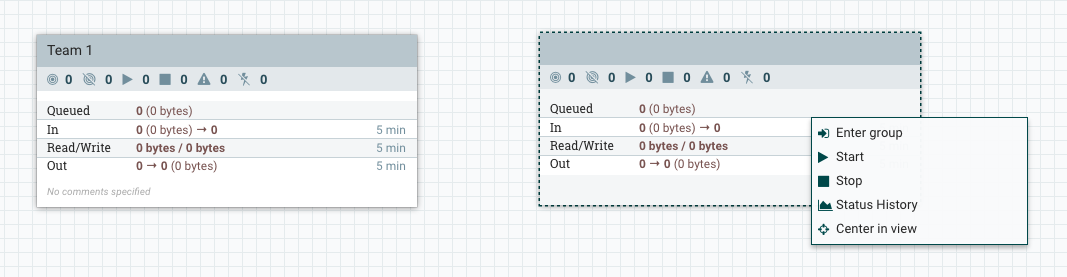
We can no longer see the name of the group, and we now have a more restrictive context menu that prevents us from configuring the group.
3. Manage your LDAP server
“phpLDAPadmin is a web app for administering Lightweight Directory Access Protocol (LDAP) servers.”
In order to use phpLDAPadmin, pass the configuration for the LDAP server through the environmental variable _PHPLDAPADMIN_LDAP_HOSTS_. To connect this service with the OpenLDAP server, pass the name of the service (fadi-openldap). To connect to the web application, run the following command in a separate shell:
kubectl port-forward service/fadi-phpldapadmin 8082:80
Now, type localhost:8082 in your browser to access the main page of phpLDAPadmin where you can connect to your LDAP server and manage it.
The first entry that will be created is for the administrator and the password is initialized to password1 which makes the credentials to use to connect to this server in phpLDAPadmin the following:
- Login DN:
cn=admin,dc=ldap,dc=cetic,dc=be - Password:
password1
For more information on how to use phpLDAPadmin, see the phpLDAPadmin documentation.
Adding a user
This section provides an example on how to add a user through phpLDAPadmin and access the Superset, Grafana and JupyterHub services.
1. Connect to phpLDAPadmin
Access your phpLDAPadmin service and connect using the admin Login DN and password, defaults are:
- Login DN:
cn=admin,dc=ldap,dc=cetic,dc=be - Password:
password1
2. Add users
To add users, there are two ways: using a template and manually.
Import the user using a template
The template below adds a user called John Doe:
dn: cn=John,cn=admin,dc=ldap,dc=cetic,dc=be
cn: John
givenname: John
mail: john@mail.com
objectclass: inetOrgPerson
objectclass: top
sn: Doe
uid: John Doe
userpassword: Johnpassword
Change the user name and other misc info (mail, etc.) and copy/paste it in the import field, here is an example of a modified template for a user called Luke Skywalker:
dn: cn=Luke,cn=admin,dc=ldap,dc=cetic,dc=be
cn: Luke
givenname: Luke
mail: luke.skywalker@mail.com
objectclass: inetOrgPerson
objectclass: top
sn: Skywalker
uid: Luke Skywalker
userpassword: ThereIsNoTry
Now go to import, paste that template and click proceed and the user will be added.
Add the user manually
Add a user manually through phpLDAPadmin, after connecting go to Create new entry here:
You can for example create a user in the default admin group cn=admin,dc=ldap,dc=cetic,dc=be, or create a new group in which you can create new users.
In this example, we are going to create a simple user under the default admin user (which is also a group).
When you click on ⭐️Create new entry here, a new window called Select a template for the creation process will show up with all the different entries you can create:
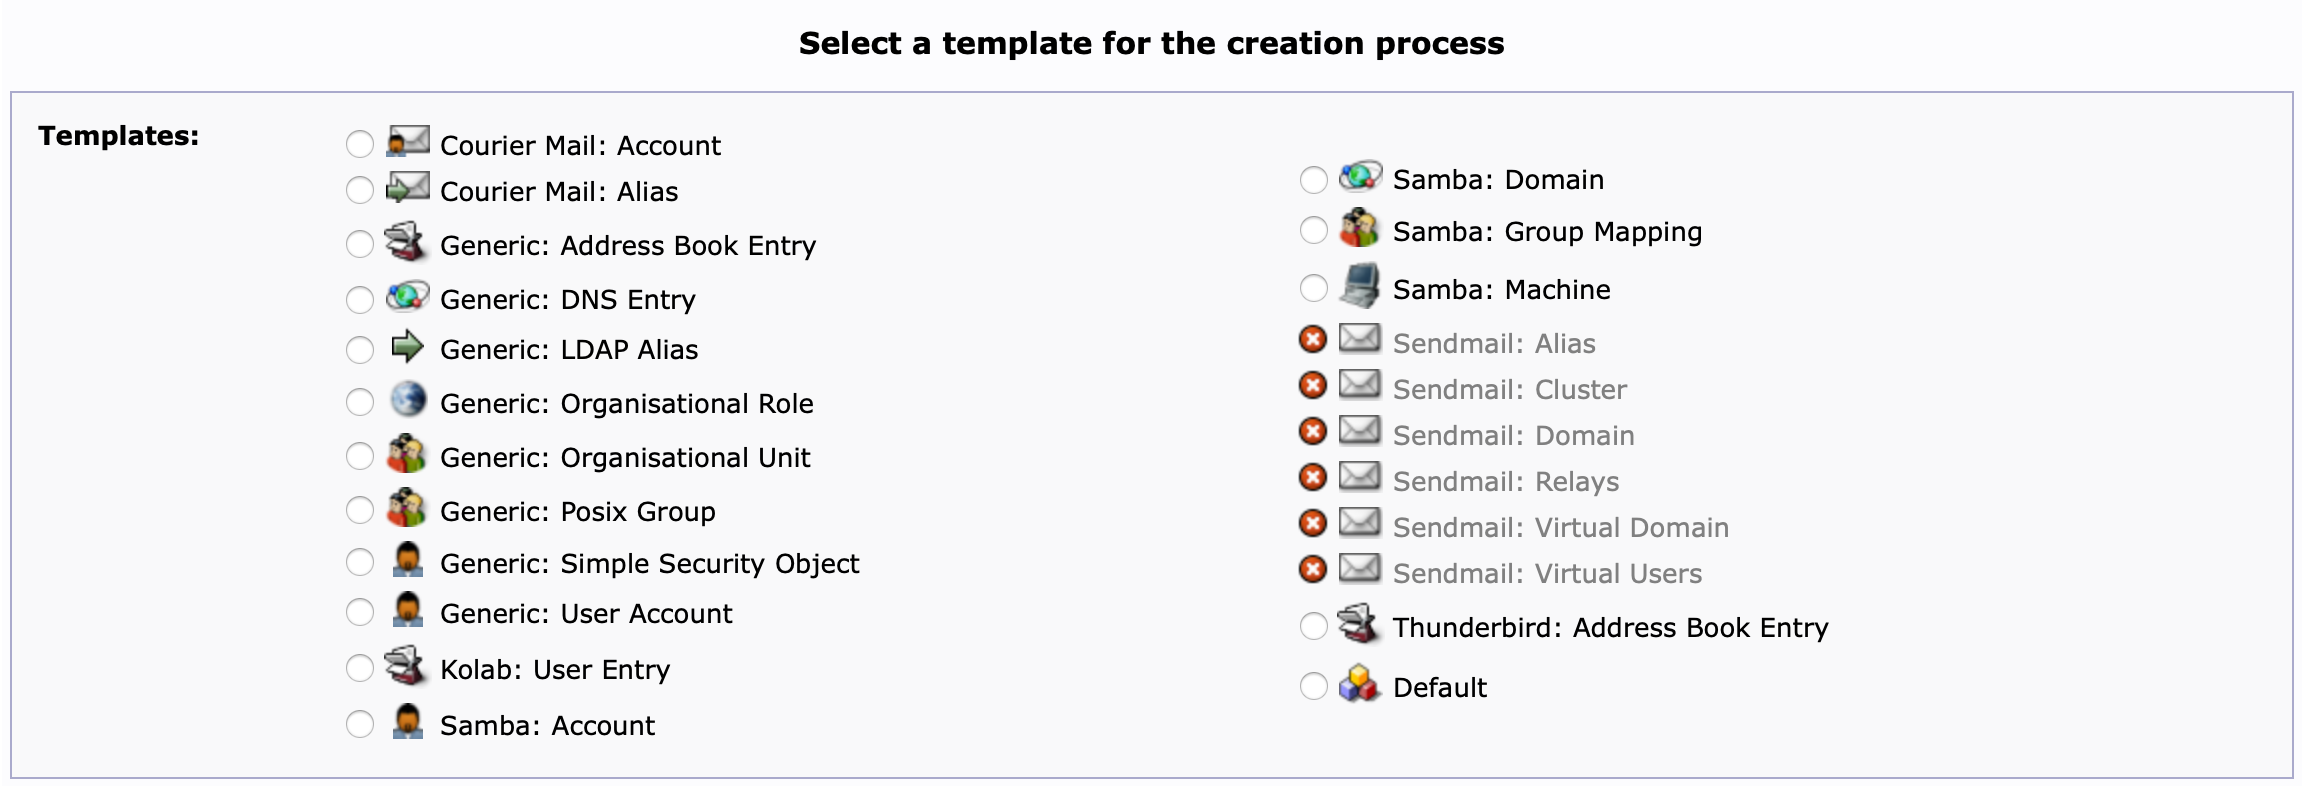
Go to Generic: User Account and a list of fields will show up. Enter the information about the user you want to create and click Create Object.
4. Creating groups
The LDAP protocol does not define how programs function either on the server or client, but the messages exchanged between an LDAP server and an LDAP client.
To manage your users you need to know how to create users/groups in the LDAP server and then you need to assign every user/group to the right service or application through the application’s configuration in the values.yaml file.
We are going to create a group called devs and a group called admins and add a user in each group and then configure each service to authenticate the newly created users/groups.
Create groups in openLDAP
Here is a simple ldif code to import that will create:
- An Organizational Unit
OU=people - A group called admins under
ou=people,dc=ldap,dc=cetic,dc=beso the dn will becn=admins,ou=people,dc=ldap,dc=cetic,dc=be - A user called
Johnundercn=admin,dc=ldap,dc=cetic,dc=beso the dn will becn=john,cn=admins,ou=people,dc=ldap,dc=cetic,dc=bewith the passwordjohn123 - A group called devs under
ou=people,dc=ldap,dc=cetic,dc=beso the dn will becn=devs,ou=people,dc=ldap,dc=cetic,dc=be - A user called
Lukeundercn=devs,dc=ldap,dc=cetic,dc=beso the dn will becn=luke,cn=devs,ou=people,dc=ldap,dc=cetic,dc=bewith the passwordluke123
dn: ou=people,dc=ldap,dc=cetic,dc=be
ou: people
objectClass: organizationalUnit

dn: cn=admins,ou=people,dc=ldap,dc=cetic,dc=be
cn: admins
gidnumber: 501
objectclass: posixGroup
objectclass: top

dn: cn=devs,ou=people,dc=ldap,dc=cetic,dc=be
cn: devs
gidnumber: 500
objectclass: posixGroup
objectclass: top

dn: cn=luke,cn=devs,ou=people,dc=ldap,dc=cetic,dc=be
cn: luke
gidnumber: 500
givenname: luke
homedirectory: /home/users/lskywalker
loginshell: /bin/sh
objectclass: inetOrgPerson
objectclass: posixAccount
objectclass: top
sn: skywalker
uid: luke
uidnumber: 1000
userpassword: {MD5}hSQr2UGesHOpB9f3VrX43Q==

dn: cn=john,cn=admins,ou=people,dc=ldap,dc=cetic,dc=be
cn: john
gidnumber: 501
givenname: john
homedirectory: /home/users/John
loginshell: /bin/sh
objectclass: inetOrgPerson
objectclass: posixAccount
objectclass: top
sn: Doe
uid: john
uidnumber: 1001
userpassword: john123
1. PostgreSQL
To copy the groups/users in postgreSQL we need to configure the Cron job that executes the tool pg-ldap-sync to synchronise the users between the LDAP server and the database, therefore we are configuring pg-ldap-sync to add the users of our group.
In the values.yaml file, head to the variable postgresql.ldap.pgldapconfig and make sure the ldap_users section looks like this:
ldap_users:
base: DC=ldap,DC=cetic,DC=be
# LDAP filter (according to RFC 2254)
# defines to users in LDAP to be synchronized
filter: (!(cn=admin))
# this attribute is used as PG role name
name_attribute: uid
# lowercase name for use as PG role name
lowercase_name: true
And the ldap_groups section looks like this:
ldap_groups:
base: DC=ldap,DC=cetic,DC=be
filter: (|(cn=devs)(ou=people)(cn=admins))
# this attribute is used as PG role name
name_attribute: cn
# this attribute must reference to all member DN's of the given group
member_attribute: member
The main change here is the filter filter: (|(cn=devs)(ou=people)(cn=admins)) in which we add the names of the groups we want to be added to PostgreSQL, for example if our filter is filter: (|(cn=devs)(ou=people)) the group admins will not be added.
2. Grafana
For Grafana, head to the variable grafana.ldap.config and make sure it looks like this:
    config: |-
      verbose_logging = true
      [[servers]]
      host = "fadi-openldap"
      port = 389
      use_ssl = false
      start_tls = false
      ssl_skip_verify = false
      bind_dn = "cn=admin,DC=ldap,DC=cetic,DC=be"
      bind_password = 'password1'
      search_filter = "(|(cn=%s)(uid=%s))"
      search_base_dns = ["dc=ldap,dc=cetic,dc=be"]
      group_search_base_dns = ["ou=people,dc=ldap,dc=cetic,dc=be"]

      [servers.attributes]
      name = "givenName"
      surname = "sn"
      username = "cn"
      member_of = "memberOf"
      email =  "email"

      [[servers.group_mappings]]
      group_dn = "cn=admins,ou=people,dc=ldap,dc=cetic,dc=be"
      org_role = "Admin"
      grafana_admin = true

      [[servers.group_mappings]]
      group_dn = "*"
      org_role = "Viewer"
The main change here is group_search_base_dns = ["ou=people,dc=ldap,dc=cetic,dc=be"] in which we add Organizational Unit OU=people so it can find the newly created groups devs and admins. Then, to manage the access (and/or roles), follow the documentation. Adding the following sample of configuration will give the group admins the admin rights and others will receive the Viewer rights.
      [[servers.group_mappings]]
      group_dn = "cn=admins,ou=people,dc=ldap,dc=cetic,dc=be"
      org_role = "Admin"
      grafana_admin = true

      [[servers.group_mappings]]
      group_dn = "*"
      org_role = "Viewer"
The admin rights make the user a Super Admin. This means they can access the Server Admin views where all users and organizations can be administrated in addition of course to creating/editing dashboards, data sources, etc. The Viewer rights allow the users to only see the created dashboards.
For more information, see the Grafana permissions overview.
3. JupyterHub
For JupyterHub, the variable jupyterhub.auth.ldap.dn.templates is a list of DNs to be accepted.
If we want to add the group devs and give them access, we add this line cn={username},cn=devs,dc=ldap,dc=cetic,dc=be where {username} is the username corresponding to the user.
Here we are not adding cn={username},cn=admins,dc=ldap,dc=cetic,dc=be so the group admins will not have access, the list should look like this:
   hub:
    config:
      JupyterHub:
        authenticator_class: ldapauthenticator.LDAPAuthenticator
      LDAPAuthenticator:
        bind_dn_template:
          - 'cn={username},cn=admin,dc=ldap,dc=cetic,dc=be'
          - 'uid={username},cn=admins,ou=people,dc=ldap,dc=cetic,dc=be'
          - 'cn={username},dc=ldap,dc=cetic,dc=be'
          - 'cn={username},cn=devs,ou=people,dc=ldap,dc=cetic,dc=be'